

Safety & Compliance for General Contracting
Safety & Compliance defines the routines and controls that keep each commercial jobsite safe, orderly, and in line with regulatory requirements and company policy. It includes project-specific safety planning, orientations, inspections, documentation, and coordination with authorities and third parties. PPE rules, signage, access control, and hazard corrections are handled through a consistent, documented approach. A disciplined safety and compliance process reduces incidents, protects the workforce, and keeps projects inspection-ready.
Prepare project-specific safety plan and job hazard analysis
Step 1: Gather project information and standard safety templates
Collect project documents including drawings, schedule, site logistics concept, scope summary, and any client safety requirements. Retrieve your company’s standard safety plan and JHA templates as a starting point. Make sure you have current regulatory guidance for the jurisdiction where the project is located.
Step 2: Identify project-specific hazards by phase and area
Walk through the planned construction phases and list likely hazards: excavation, working at heights, crane operations, hot work, confined spaces, energized systems, nearby traffic, and public or tenant exposure. Consider where in the building or site each hazard will occur and which trades are involved. Note environmental factors like weather, noise restrictions, or adjacent occupancies.
Step 3: Define controls, procedures, and safety responsibilities
For each hazard, specify practical controls such as guardrails, fall protection systems, trench boxes, spotters, lockout/tagout procedures, and housekeeping rules. Assign safety responsibilities to roles (for example, who is competent person for excavation or scaffolding). Include how often checks will be performed and how issues will be escalated.
Step 4: Draft the project safety plan and JHAs
Complete the safety plan template with project details, hazard lists, control measures, emergency procedures, and contact information. Create JHAs for high-risk tasks that break down steps, hazards, and controls in simple language. Make sure the documents are understandable for field supervisors and crews.
Step 5: Review, finalize, and distribute the plan
Review the draft plan and JHAs with the project manager, superintendent, and safety manager. Adjust based on their input, then finalize and save in the project safety folder. Distribute the plan to field leadership and use it as the basis for orientations, toolbox talks, and safety inspections.
Set up site safety signage, barriers, and access controls
Step 1: Review safety plan and logistics for control needs
Use the safety plan and site logistics plan to identify where fencing, gates, barriers, and signage are required. Pay attention to public interfaces, vehicle entry points, fall hazards, crane swing zones, and shared access with tenants or other contractors. Decide what must be controlled 24/7 versus work hours only.
Step 2: Install perimeter fencing, gates, and barriers
Set up fencing or other perimeter controls according to the plan. Install clearly defined personnel gates and equipment gates, ensuring they can be secured after hours. Add barriers around open excavations, elevated work zones, and other high-risk areas.
Step 3: Post safety and regulatory signage
Place signage at site entrances and key locations indicating PPE requirements, authorized personnel only, emergency contacts, and specific hazards (for example, “Overhead Work,” “No Public Access,” or “Confined Space”). Use durable signs that are visible in the expected lighting conditions and in appropriate languages for your workforce.
Step 4: Define and mark access routes and restricted areas
Mark safe pedestrian walkways, vehicle paths, and exclusion zones with cones, tape, paint, or barriers. Identify loading areas and keep them separate from pedestrian traffic where possible. Clearly mark areas where only specific trades or trained personnel may enter.
Step 5: Inspect and adjust controls regularly
After initial setup, walk the perimeter and work areas to confirm controls are effective and match the plan. Make adjustments where you see gaps, such as unmarked edges or blind corners. Plan to re-check controls routinely, especially after major site changes, storms, or incidents.
Conduct site safety orientation for new workers and visitors
Step 1: Define who must receive orientation
Decide which categories of people require full orientation, such as all workers, regular vendors, design staff making frequent site visits, and client representatives. Clarify any exceptions for brief escorted visitors and what they are allowed to do on site.
Step 2: Prepare orientation content and materials
Use the company’s standard orientation script or slides and customize it with project-specific information from the safety plan. Include PPE rules, site access points, restricted areas, emergency procedures, incident reporting, and any special hazards or client rules. Prepare sign-in sheets or digital forms to record attendance.
Step 3: Schedule and communicate orientation sessions
Determine how often you will run orientation sessions (e.g., daily at a set time, or as needed when new crews arrive). Inform subcontractors that workers are not allowed to start work until they complete orientation. Post orientation times at the site entrance or in pre-job communications.
Step 4: Deliver the orientation on site
Gather new workers in a safe area away from active work. Present the content in clear, practical language and use maps or photos to show key site features. Pause for questions and make sure participants understand how to get help and who to contact in an emergency.
Step 5: Record completion and issue any required identifiers
Have each participant sign the orientation log or complete a digital acknowledgment. If your company uses stickers, badges, or hard-hat markings to show completion, issue them at the end of the session. Store orientation records in the project safety folder so you can verify training during audits or after incidents.
Perform regular safety inspections and document findings
Step 1: Set inspection frequency and responsibilities
Decide how often formal inspections will occur (for example, weekly for smaller sites, twice weekly for larger or higher-risk jobs) and who will perform them (superintendent, safety manager, or both). Put inspection times on a recurring calendar so they are not forgotten during busy periods.
Step 2: Use a structured inspection checklist
Prepare or customize a checklist that covers common risks: fall protection, scaffolding, ladders, housekeeping, electrical safety, trenching, equipment, PPE, and signage. Include fields for location, observations, risk level, and corrective actions so inspections are consistent.
Step 3: Walk the jobsite systematically
Follow a consistent route that covers entrances, walkways, active work areas, storage and laydown, elevated work zones, and any special-risk areas. Observe both physical conditions and worker behavior. Take notes and photos for any unsafe conditions or good practices you observe.
Step 4: Document hazards and assign corrective actions
Record each issue in your inspection log or app, including location, description, responsible trade, and recommended corrective action. Give each item a priority based on severity and likelihood. Assign a target completion date and share the list with responsible foremen.
Step 5: Review inspection results and track closure
After each inspection, review findings with the superintendent and, where appropriate, the project manager. Ensure trades understand what they must correct and by when. Monitor that issues are closed out and update your log to show completion dates and any repeat issues.
Enforce PPE requirements and core site safety rules
Step 1: Confirm and communicate required PPE and rules
Review company policy and any project-specific requirements to define minimum PPE (such as hard hat, safety glasses, high-visibility vest, gloves, and boots) and other core rules like fall protection, ladder use, and tie-off requirements. Communicate these during orientation, in postings at the gate, and in daily huddles.
Step 2: Observe compliance during routine walks
As you move around the jobsite, watch for PPE use and general rule compliance. Pay particular attention to high-risk work such as working at heights, using power tools, or working near mobile equipment. Treat safety observation as part of your normal field presence, not a separate event.
Step 3: Correct violations immediately and clearly
When you see a violation, address it directly with the individual and their foreman. State what is wrong, what must change, and why it matters. Require the correction immediately, such as putting on safety glasses or moving a ladder, and stay long enough to see that it happens.
Step 4: Apply progressive discipline for repeated issues
If a worker or crew repeatedly ignores safety rules, follow your company’s escalation steps, which may include written warnings, removal from site, or barring the worker from future projects. Coordinate with the subcontractor’s management so they understand the seriousness of the issue.
Step 5: Record serious or repeated violations
Log serious violations and repeated non-compliance in your safety records, noting the trade, location, nature of violation, and actions taken. Use this information in safety meetings, subcontractor performance reviews, and future bid decisions to drive improvement and accountability.
Manage incident and near-miss reporting and follow-up
Step 1: Define what must be reported and to whom
Clarify which events require reporting: first-aid cases, recordable injuries, property damage, equipment incidents, environmental releases, and near misses. Specify who must be notified (superintendent, safety manager, project manager) and within what timeframe. Communicate expectations in orientation and postings.
Step 2: Respond immediately to incidents and secure the area
When an incident occurs, make sure injured workers receive appropriate medical attention and call emergency services if needed. Stabilize or isolate the area to prevent additional harm. Stop work in the immediate vicinity until the situation is under control.
Step 3: Document initial facts and notifications
Record basic information as soon as practical: date, time, location, people involved, witnesses, and what activity was occurring. Note any initial actions taken and who was notified. Use the company’s incident report form or system to ensure you capture required details.
Step 4: Investigate to identify contributing factors and root causes
Conduct an investigation appropriate to the severity of the incident. Interview witnesses, review site conditions and equipment, and examine procedures and training records. Look beyond individual behavior to factors like planning, supervision, design, or equipment selection.
Step 5: Implement and track corrective actions
Based on the investigation, define specific corrective actions such as training refreshers, procedure changes, equipment upgrades, or disciplinary measures. Assign owners and due dates and track completion. Share key lessons with the project and, where appropriate, across the company so similar events are less likely elsewhere.
Maintain required regulatory postings and on-site safety documentation
Step 1: List required postings and documents for the project
Using regulatory guidance and company policy, create a checklist of required postings such as OSHA notices, workers’ compensation information, emergency contacts, and any project-specific signs. Add documents like the safety plan, JHAs, SDS, permits, and inspection logs.
Step 2: Set up a safety information station
Designate a visible location (job trailer, gate board, or dedicated kiosk) for safety postings and key documents. Arrange postings in a clear order so workers can quickly find emergency numbers and rules. Protect documents from weather and damage using covers or frames.
Step 3: Post current regulatory and project information
Install required posters and project-specific information, checking that names and phone numbers are accurate. Add site maps, muster points, and evacuation routes if these are part of your standard setup. Remove outdated or duplicate postings that could cause confusion.
Step 4: Organize detailed safety documents for access
Store the full safety plan, JHAs, SDS binders, inspection logs, and incident reports in a labeled binder or digital folder in the trailer. Make sure supervisors know where these documents are kept and how to retrieve them during inspections or emergencies.
Step 5: Review postings and documents regularly
On a regular schedule (for example, monthly or when conditions change), inspect the safety station and document storage. Replace damaged or outdated materials and update contacts or procedures as needed. Note these checks in a simple log to demonstrate active management.
Coordinate required third-party or authority safety inspections
Step 1: Identify safety-related inspections and stakeholders
From permits, contracts, and client requirements, list safety inspections that will occur, such as OSHA visits, insurance inspections, client EHS audits, or city safety reviews. Note who initiates them and typical triggers (for example, start of structural work, incident, or random audits).
Step 2: Prepare the site and documentation for inspection
Before a planned inspection, review recent safety inspection logs and correct outstanding issues. Walk the site to confirm housekeeping, access, PPE use, and controls meet standards. Ensure the safety plan, JHAs, postings, and incident records are up-to-date and accessible.
Step 3: Assign a knowledgeable site representative
Designate a superintendent, safety manager, or other qualified person to escort the inspector. Make sure they understand the project, safety controls, and where documents are stored. Brief them on any recent incidents or unusual conditions that may draw questions.
Step 4: Escort the inspector and capture feedback
During the inspection, provide honest answers and prompt access to requested areas and documents. Take notes on observations, concerns, and any suggested improvements. Avoid arguing; if you disagree, note the point and plan to follow up later with supporting information.
Step 5: Review findings and implement corrective actions
When you receive an inspection report or verbal summary, review it carefully. Identify required corrections, deadlines, and any potential citations or client concerns. Plan corrective actions, assign responsibility, and track completion. File the report and proof of correction in the project safety records.
Correct safety violations and document corrective actions
Step 1: Log safety violations and hazards
When you or others identify a hazard or violation, enter it into a tracking log with the date, location, description, and source (inspection, observation, incident). Include the responsible trade or party if known. Assign a risk level to help prioritize response.
Step 2: Assign corrective actions and deadlines
Define what must be done to correct each issue, such as installing guardrails, removing debris, or retraining workers. Assign each action to a specific trade, supervisor, or internal staff member and set a due date based on the severity and risk of the issue.
Step 3: Monitor progress and verify corrections
Follow up with responsible parties before deadlines to confirm they are working on corrections. Once they report completion, visit the location to verify that the hazard has been fully resolved and that the fix meets safety standards, not just a minimal patch.
Step 4: Update the log and close items
Mark items as closed in the log only after you have verified the correction. Record the date and a brief description of what was done. Attach photos if helpful for future reference or to show regulators and clients that action was taken.
Step 5: Analyze recurring issues and escalate as needed
Periodically, review the log for patterns such as repeated violations by the same trade, crew, or type of work. Share these patterns with project and safety leadership. Consider stronger measures such as focused training, contractual actions, or replacing a trade if behavior does not improve.
Review safety performance periodically and update the safety plan
Step 1: Define review cadence and data sources
Decide how often you will review safety performance (for example, monthly or at major phase changes). Identify the data you will use: inspection logs, incident and near-miss reports, corrective action logs, and observations from superintendents and safety staff.
Step 2: Analyze trends and problem areas
Look for recurring violations, frequent incident types, and areas of the site or phases of work with more problems. Note improvements as well as deterioration. Consider whether issues are linked to specific trades, scopes, or schedule pressures.
Step 3: Discuss findings with project leadership and key trades
Meet with the project manager, superintendent, and safety lead to review your analysis. Share specific examples and ask for their perspective on root causes. Where appropriate, involve key subcontractors in discussions about their crews’ performance and needed changes.
Step 4: Update safety plan, JHAs, and focus areas
Based on the review, adjust the safety plan and JHAs to emphasize emerging risks or tighten controls on recurring issues. Change inspection focus areas, toolbox talk topics, or enforcement priorities as needed. Document revisions with dates and short explanations.
Step 5: Communicate changes and monitor effectiveness
Share key changes with all supervisors and trades through meetings, emails, or posted bulletins. Explain why adjustments are being made and what behavior or conditions must change. In subsequent reviews, check whether the changes are having the desired effect and adjust again if necessary.
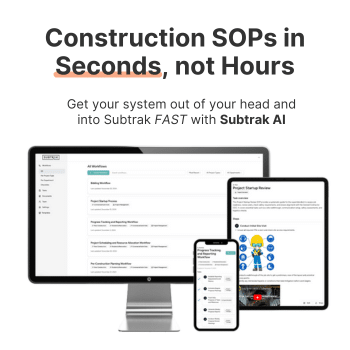
👈 Use this SOP template inside Subtrak
Edit with AI. Customize in seconds. Store and share all your SOPs and checklists in one place.